Example 06: Version Control and git
Cloning a Repo
git clone puts the repo in your current folder.
❯ cd Documents/data/
❯ git clone https://github.com/kjhealy/covid-project.git
Cloning into 'covid-project'...
remote: Enumerating objects: 23, done.
remote: Counting objects: 100% (23/23), done.
remote: Compressing objects: 100% (15/15), done.
remote: Total 23 (delta 8), reused 22 (delta 7), pack-reused 0 (from 0)
Receiving objects: 100% (23/23), 577.21 KiB | 5.77 MiB/s, done.
Resolving deltas: 100% (8/8), done.

❯ cd covid-project/
❯ ls
README.md      covid.Rproj    covidcases.qmd data
Now you have access to the full history and any branches, etc:
❯ git log --oneline
06677f4 (HEAD -> main, origin/main, origin/HEAD) Load the US data
4a77b2f (origin/figtest) Fixed the plot
912aed7 Checking ggplot code
6df6d6b Began writeup
ef07721 Data and Rproj files
f43f6f1 Added covidcases
Status
Having just cloned the repo we are up to date:
❯ git status
On branch main
Your branch is up to date with 'origin/main'.

nothing to commit, working tree clean
What branches exist
❯ git branch -a
* main
  remotes/origin/HEAD -> origin/main
  remotes/origin/figtest
  remotes/origin/main
The * shows the local branch we’re on. There are also remote branches, notably the figtest one.
We can check out a branch with checkout or co.
❯ git co figtest
branch 'figtest' set up to track 'origin/figtest'.
Switched to a new branch 'figtest'
And go back to main:
❯ git co main
Switched to branch 'main'
Your branch is up to date with 'origin/main'.
Front Ends or Clients
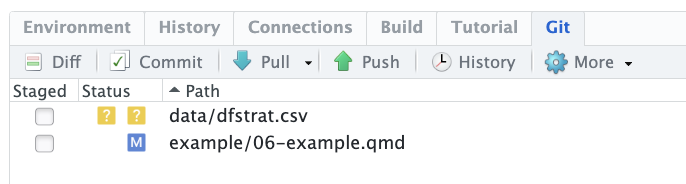
You don’t have to access git from the command line. You can do it from inside RStudio, for instance:
The RStudio git client is pretty rudimentary. There are others, such as GitKraken, which is free; Tower, which is not; and GitHub’s GitHub Desktop, which is aimed at using git with GitHub specifically.
Create a Repo on GitHub and Push To it: The long way
The steps are:
While logged in to GitHub, in your browser:
- Create a repository on GitHub from https://github.com/new
- Choose a name, e.g.
sample_repo. - Choose whether it’s public or private.
- Don’t add a README, a
.gitignorefile, or a license. - Click “Create repository”
The next page you’ll see in the browser contains instructions for what to do next at your Terminal. They are:
If you are creating a local repository from scratch
- Create your project folder either manually or with RStudio
- Initialize a git repository, again either manually with
git initor by checking the box in RStudio to use git. - Add files with
git addand commit them withgit commit - Make sure you’re on the
mainbranch withgit branch -M main - Make git aware of the GitHub repo with
git remote add origin https://github.com/kjhealy/sample_repo.git(your username/repo name will vary!) - Push to the remote:
git push -u origin main
If you already have a local git repo and want to add it to GitHub
- Make sure the empty repo name on github is the same as your local one.
- Add the remote to your local repo:
git remote add origin https://github.com/kjhealy/sample_repo.git - Make sure you’re working on the
mainbranch:git branch -M main - Push to the remote:
git push -u origin main
Creating and populating a GitHub Repo directly from the Terminal
If you use GitHub’s CLI tool you can make this process easier.
The CLI tool is called gh. If you already have a local repo and want to create, e.g. a GitHub copy of it, even when you have no repo of that name on GitHub yet, then from inside your project folder, do
❯ gh repo create --private --source . --pushDon’t forget that ., it means “from here”. You can change --private to --public if you want.